Showing posts with label Model Trains. Show all posts

Wednesday, December 2, 2015

Product Review: Walther Metroliners

Several months ago, Walthers released their Metroliner models. Even though I have little desire to eventually model the Northeast Corridor, this was an intriguing model to me. I was curious to see how it had turned out. I was curious to see how well they had hidden the motor, and how well the models ran. I was also curious to hear the sound. Electric model sound is somewhat of a rarity in the hobby, as most modelers choose subjects that use either steam or diesel locomotives. While I have heard plenty of electric locomotives in the "real world," I was curious about how one might sound in the layout room. Despite all of this curiosity, I initially chose not to buy any Metroliners, on account of the price and my disinterest in actually modeling a railroad where they operated.

All photos by James Ogden.
Several weeks ago, I got an email from Walthers, indicating that the Metroliners were on sale. The catch was that you had to buy four of them, but in packages of four, they were going for about half price. Despite not wanting to model a railroad on which they operated, I could not resist. I took the plunge and bought a four-pack of Amtrak Phase 2 Metroliners. Four-packs of different paint schemes came with different combinations of cars. I chose Amtrak Phase 2 primarily because I liked the consist it offered. In that particular package there were two coaches, a parlor, and a snack bar coach. I ordered the set, and approximately one week later they arrived at the door.

Upon arrival, I opened the box and did a quick inspection of the cars through their individual boxes. I was headed to the Northern Lights Model Train Club that evening anyway, so I decided to do the bulk of the inspection and operating there. The club has much more space to run on!

I ordered a set of cars that were all equipped with DCC and sound from the factory. These are equipped with Tsunami decoders, from SoundTraxx, which are specifically designed for this model. Like most decoder equipped models, the cars were all programmed to respond to address 3 initially. The cab ends of all cars, regardless of specific type, are programmed as the front. As such, if you intend to run several cars together, they will need at least some minor programming to respond in unison when facing in opposite directions. Since I had four cars, I chose to run them with two facing forward and two facing back. To facilitate this, I set up a consist, and programmed two of them to run in reverse within the consist. This was the extent of the programming I did. After that, I placed them on the layout, in the staging yard, and ran them out to the main layout.

Right off the bat, I was impressed with how smoothly the cars operated together. I had done nothing to attempt to speed match them, but they were pretty well matched right out of the box. One would think this is normal--they each have the same decoders and electronics--but it is not always the case. I noticed some minor surging between cars at very low speeds. Once the speed was above a crawl however, the cars ran very smoothly together.

The prototype Metroliners had a headlight on each end, and markers on the A end. Because the headlight function on most DCC decoders allows for two outputs, instead of three, Walthers chose not to light the "B" end headlight. Instead, they chose to light the "A" end, or cab end, marker lights. When the car is operated forward, that is with the cab leading, the cab end headlights come on. When the car is operated in reverse, the marker lights on the cab end light up.

In addition to headlights and markers, the cars also have lighted number boards, lighted interiors, and a Mars light, activated by functions  one, five, and six. There are also typical sound functions, such as the horn, coupler noise, brake squeal, cooling fans, and air compressor. Note that the prototype had no bell, and so the model has no bell sound. As one would expect from a SoundTraxx product, the sound quality was excellent. The cars were a little loud for my taste, but the sounds were clear and responsive to throttle inputs. The sound volume can easily be adjusted to the desired levels.

The cars were nicely detailed from the factory. The underbody matched photographs I looked at, and the model came equipped with finer details, such as grab irons and rooftop electrical details. The only disappointment I had in the details were the pantographs. There are a couple of different types of pantographs featured on the cars, but I was disappointed that they were plastic. They were clearly not designed to collect current from an overhead catenary, and that is just fine. In HO scale, that is not usually reliable or practical anyway. But, during the models' life on a layout, chances are the pantographs would be handled a bit. They are fairly fine details, and I think they would hold up better if they were metal, instead of plastic. Other than that though, I felt as if the model was nicely detailed. While it looked out of place on the club layout, which is set in fiction but represents Alaska, they are nice looking models.

Overall, I think this is a fine model. For those who model the Northeast Corridor, particularly in the 1970's and 1980's, these would be a great addition to the fleet. They fill a noticeable void, and are a major improvement to the Metroliners offered by Bachmann many years ago. However, being as these only operated under catenary in the northeast, these models fill a very specific place. I think most modelers, like myself, will find that these probably do not fit well on their layouts. They are lovely models, but if you do not model the area they ran, they will always look a bit out of place. To be honest, I was surprised that Walthers would pursue such a model. Surely other Amtrak models would have been applicable to more modelers.

Manufacturer: Walthers Proto
Paint Schemes: Penn Central, Amtrak Phase 1, Phase 2 (Phase 1 cars come numbered, others come with number decals.)
Cars: Snack Bar Coach, Parlor Car, Coach
MSRP: $169.98 with DC, $259.98 with sound and DCC

To view more photos, please visit out Facebook page.


Saturday, April 4, 2015

Boston, Concord, & Montreal Railroad

I've made some progress on the model railroad, but before I get into that, I promised in my last post that I would explain my fictional railroad, so I thought I'd take the time to do that today.  I consider it a semi-fictional railroad.  Let me explain what I mean by that.  In the mid-19th century, when small railroads were starting to consolidate into larger ones, the Boston, Concord, & Montreal railroad was formed out of several of the small railroads in Massachusetts and southern New Hampshire.  When it was formed, tracks existed between Boston and Concord (New Hampshire), and the plan was to continue building north.  The railroad built north through New Hampshire's lakes region and into the foothills of the White Mountains to a small town called Woodsville, on the Connecticut River and the border with Vermont.  They also built a branch out of Woodsville into the White Mountains which connected with the Portland and Ogdensburg, another big railroad of the day.  P&O was eventually consolidated into Maine Central, and BC&M was consolidated into Boston & Maine, and plans to continue the line to Montreal were abandoned.  Canadian Pacific built tracks south to Woodsville, so the line eventually reached Montreal, and they were used as B&M's main route to Montreal.

Boston & Maine later came under the control of the New Haven Railroad, which wanted to control the larger railroads in New England, consolidate them into one company, and electrify the important routes.  They experimented with third rail electrification near Hartford; however, it led to many accidents and the state of Connecticut banned the use of third rail electrification within its borders.  This forced the New Haven to look into overhead catenary, which at the time was only used on streetcar and interurban lines, and only with low voltage DC power.  New Haven did extensive research and developed a high voltage AC system and strung wires along part of their main line out of New York.  The tests were successful, and wires were extended to New Haven and along several branch lines.  New Haven was also responsible for stringing catenary through Boston & Maine's Hoosac Tunnel.  However, New Haven came under new management, and the plans to electrify all the busy routes in New England were dropped.

All of that being said, I am still modeling the present day.  I wanted to give some background information, which will tie in here.  My version of the BC&M is a "what-if" situation: What if the BC&M was never bought out, and survives today as a Class 2?  This led me to a few conclusions.  First is that the railroad completed their line to Montreal.  I don't know what route they were planning on building, and I don't know that the railroad itself had any plans either, so I will use the existing former CP route between Woodsville and Montreal as BC&M's main line.  The second conclusion is that for a while in the early 20th century the BC&M was under the control of New Haven.  Since I like the idea of electrification, I used this as an excuse to have catenary on my railroad.  Since the Boston to Concord corridor is fairly heavily populated, and at the time had a lot of rail traffic,then in my world the route between the two cities was electrified by New Haven, and that the wires survive today and the BC&M still uses them.  However, I don't plan on modeling today's amount of rail traffic on the line.  Today, the line barely exists between Concord and Plymouth, NH, and between Plymouth and Woodsville the tracks are gone.  There is no direct rail connection between Boston and Montreal anymore.  However, since in my world it is all run by one railroad, none of the abandonments happened, and the route is still the main line between the two cities, and therefore has much more traffic on it today.  Finally, since the area today is ripe for a commuter rail service, I will model a fictional commuter service to Montreal, which of course will also use the catenary.

However, most of that does not have to do with this model railroad, except that I am modeling a branch of the BC&M.  The branch will not be electrified, I will use diesels to run the trains.  When (if) I ever get the chance to build a basement empire, I will model a much larger BC&M and have electrification on the layout.

When we put together the maps section in our resources page, I will include a map of the BC&M for reference.  In the meantime, this scan of on old Boston and Maine timetable will give you an idea of the route I am talking about.  It is the one on the top of the page, the Canadian Pacific route to Montreal. Canadian Pacific tracks began at Woodsville.

Finally, here are a couple of paint schemes I designed for the railroad.  I used a GP38-2 and a SD40-2 to design the paint scheme, but I am not sure yet what I will use for motive power.


Friday, December 5, 2014

Steven's First Annual Christmas Layout

Okay, so calling it a layout may be a bit of a stretch.  It's a Christmas layout, so it's temporary, I'll be taking it down after Christmas.  But I'm hoping this will become an annual thing, where I'll set up a train each year around Christmas.

I used a 2 1/2 by 5 foot folding table as my "benchwork," which doesn't give enough space for a full loop in HO scale, so I had to do it in N scale.  I had never worked in any other scale than HO before, and I learned a few things from this.

First, a lot of the knowledge I have about model railroading is only applicable to HO scale.  I know who a lot of good manufacturers are, as well as manufacturers that produce cheap models, but there are different manufacturers for N scale.  Some HO manufacturers don't produce anything in N scale, and there are other manufacturers that make N scale models but do nothing in HO.  Honestly, I felt a little lost when I was looking for a train for the setup!  Something else I hadn't thought of was that I know what a tight radius curve is in HO scale, and I know what a wide curve is.  I had no idea what was considered tight in N scale, which made it hard to select track.

I ended up buying a loop of Bachmann E-Z track that fit on the table that I had.  I learned that HO and N scale use the same type of power, and I used a spare DC power pack that I had for power.  I had no idea what type of train I wanted to model, but I found a Boston and Maine Alco RS-2 for a good price, so I decided I would model a transition era freight train.  I found a matching caboose and four 40-foot box cars with New England road names, and I had my train.

Since this was to be a temporary Christmas layout, I had no plans to use N scale structures or to do any scenery.  I used ceramic Christmas village buildings as my structures, and a table top Christmas tree, to fill in the space inside the loop of track.  I ran an extension cord over the track by wrapping it around one of the branches of the Christmas tree and down the trunk, and I used that to provide lights for both the Christmas tree and the buildings.

My plan here is to change something on this setup each year.  In the future, I plan on adding a second track so I can have a second train, and depending on space, a small staging yard so I can have options on what I want to run.  The Christmas village buildings that I used this year are large for N scale, but there are smaller ones available, so in the future I want to use the smaller ones.

Anyways, it has been fun setting up this temporary Christmas layout, and I look forward to doing it each year and sharing it each year on this blog!

Here are some photos of the layout:


Friday, August 1, 2014

A New Model Railroad

I recently began construction on a new model railroad.  I will post a track plan when I start laying track, today I will talk about the benchwork and my plans for this layout.

It is a small switching layout loosely based on the Hillsboro Branch in southern New Hampshire.  The real line is owned by Pan Am Railways, but on my layout it will be operated by a semi-fictional railroad, the Boston, Concord, and Montreal.  I will go into a more detailed description of the story behind BC&M later, and include a map of where the branch line is.

I tried a few new techniques on this model railroad that I have not tried before.  First, I used plywood instead of dimensional lumber.  I found that using 3/4 inch plywood and cutting it into the various dimensions I needed would cut my lumber cost in half.  I had just enough lumber from one sheet of plywood to build what I have built, however, I still have a small staging yard to build, and I will just buy dimensional lumber for that rather than get a whole new sheet of plywood only to use a small piece.  I found that I could not use screws to hold the plywood together, as the screws would split the plywood.  I ended up using finishing nails and wood glue to hold all the boards together.

I built most of the benchwork out of 4 inch boards, however, along the fascia, I did not want to cut holes through plywood to mount toggle switches and other fascia mounted controls.  I instead used two, 2 inch boards, spaced two inches apart, and I will mount fascia controls in a recessed pocket in the 2 inch space.  This meant a couple of changes.  Since the 2 inch boards aren't very sturdy, I put a 4 inch board 6 inches behind them to be the main support at that side of the benchwork.  It also made the whole front of the structure 6 inches wide, and I had to use 6 inch boards at either end of the fascia side to support the 2 inch boards.  If you are confused now, it will make sense when you see the photos.  The downside to this method, which I did not foresee, was that it is difficult to squeeze tools into the 6 inch space between the fascia and the support beam, but I managed to make do.

The main part of the layout is 8 feet by 6 feet, and it is L shaped.  I say the main part, because there are two extensions.  One extends behind the door to the room, giving me more space for a passing siding while not eating any otherwise usable room space.  The other extension, which I have not built yet, will be a 5 foot 3 track staging yard.  I do not have space to make it longer than that, so it will be a stub end fiddle yard.  The door extension is 6 inches wide, and the staging yard will be 8 inches wide.  The rest of the benchwork is 18 inches wide.

As you can see in the photos, there is no surface to the benchwork yet, and I have started wiring.  I will explain the details of the wiring in a later post, when it is finished.  I wanted to get as much wiring done before putting down a plywood surface, to minimize crawling underneath the layout as much as possible.  Of course, some wiring, like track feeders, will have to wait, but I am installing all bus wires and toggle switches while I have access to them from above.

Track on this layout will most likely be handlaid.  I have never handlaid track before, but I have always wanted to give it a try.  This is a small enough layout that I feel comfortable trying it out.  However, if I choose not to handlay the track, I will probably splurge and use all Peco track.

All turnouts will be powered with Tortoise slow-moving switch machines.  While this sounds like overkill for a branch line that has no signalling and all hand throw turnouts, I have been to many operating sessions where people damage hand throws and other parts of the layout when reaching across the layout.  I want to reduce the reaching across the layout as much as possible, and all turnouts will be powered to prevent this.  They will all have dummy ground throws so they look right, but the actual turnout controls will be on the fascia.

Well, without any further ado, here are some photos of the layout:

A general view of the layout, from the staging yard end (staging yard not built yet).
Another general view of the layout, seen from the door to the room.
The extension behind the door to allow a longer passing siding.
The main power outlets for the layout, where the DCC system and accessory power will all plug in.
These photos, along with all future photos of the layout, can be seen in the photo album on our Facebook page.  If you haven't liked us on Facebook yet, you are missing out!  We have all kinds of photos and extra information on there.

Sunday, August 18, 2013

Working Hard!

First of all, I must apologize once again that I am writing so infrequently. This is not due to a shortage of activity, but actually quite the opposite. Between work, volunteering to work on engine #557, and some projects at a local model railroad club, I have been extraordinarily busy!

Progress on the 557 is going nicely. We have acquired some sandblasting equipment and will start cleaning up a lot of the parts. The equipment is not big enough to do the major components of the locomotive, such as the boiler or frame, but it will accommodate many of the more portable parts quite nicely. Additionally, the cab was sent out to a company that donated the labor to sandblast and paint it. We just got it back this week, in green primer. The biggest task remaining is to replace the firebox, which happens to be the next major task actually. Hopefully that will be complete before the weather gets cold. The engine house is not heated.

At the local model railroad club, we had been having some pretty serious and unpredictable electrical problems. The sustainability of the layout was questionable, and normal operations were severely compromised. I suggested we basically rewire the entire thing. It was built about 30 years ago, and designed to run on a direct current power system. Once DCC came into the picture, it was rewired for that, but using some existing wire and some new. Nothing was color coded and very little was labelled. Since it was built, all troubleshooting occurred with no color or labeling and no standardization. All of this made finding and solving the problems difficult and highly impractical. The way the club operates most of the time is when someone suggests a project, they are designated the leader by the rest of the membership. That made me the leader on replacing the electrical system. It was decided that we would only do a portion to start, so that the layout would still be functional, in some form, during the project. Also, any changes or modifications to the track work or scenery would be done simultaneously. This was because almost every layout system ultimately relies on the electrical system. A color code was developed and standards were adopted, and we went to work. As of yesterday afternoon, the section we started with is complete and operating. It has seen a few significant upgrades, including the addition of its own power district, circuit breakers, energized switch frogs, a line change, and the removal of one tunnel and replacement of one bridge. We removed an estimated 3,000 feet of wire and replaced it with less than 300 feet, yet increased reliability and performance. We accomplished all of this in three weeks less than planned.

Work is where I have been spending most of my time, it seems. In July, they started running three person crews on almost every train. This was good because it gave Brakemen, including myself, the opportunity to see some of the railroad outside the yard. I went to Fairbanks three times, Whittier once, and Seward once. Fairbanks is a pretty easy trip, but it is long. The passenger trains run during the day, so to help prevent congestion, and potential delays, the freight trains primarily run at night. There is a freight train that operates northbound and one that operates southbound, between Anchorage and Fairbanks, almost every day of the week. Usually they depart their origin at around 8:30pm, and arrive at their destination 11 to 12 hours later. The trip is 358 miles, and includes both mountain grades and much more gentle river grades. The scenery can be spectacular, when it is light out, which, in the summer, is most of the night.

Whittier was certainly interesting. It is much closer to Anchorage, and freight trains only go there a couple times a week. Whittier is where the Alaska Railroad interchanges with other railroads. There is no direct rail connection between Alaska and the Lower 48 or Canada, so the interchange traffic moves on barges. These barges are huge, about 450 feet long, with eight tracks side by side. There are stantions between the tracks that support containerized cargo above the rail cars. The containers can be stacked four or five high. The barges operate between Whittier and Seattle and between Whittier and Prince Rupert, BC. They carry about 15,000 tons of cargo on the week long voyage. Usually, we operate freight trains to Whittier only when a barge will be in town. When I went to Whittier, we spent the day switching out our train and unloading the barge. We spent that night in a hotel in Whittier, and the next morning, we loaded the barge, built a new train, and brought it back to Anchorage with all the freight we had taken off the barge.

When I went to Seward, we had been assigned to relieve the coal train crew. When we arrived, they were still dumping the coal out of the train. They finished that up, and then we put it together and left town northbound. We brought it back to Anchorage. The coal comes from the Usibelli Mine, in Healy. It gets stockpiled in Seward and periodically loaded onto a ship, which takes it to South Korea. Typically there is a coal ship in Seward about once a month. It takes 24 hours to fully load the ship.

I have also worked a few other trains. To me, the most interesting have been the passenger switching jobs, in the yard. In the evenings, as the passenger trains get in, the yard crew goes out and meets them at the depot. The road crew gets off as soon as they pull in, and the passengers disembark. While still parked behind the depot, the cleaning crew gets on, and the first thing that gets done is a truck comes along and pumps all the toilets. Once that is done, we take the train to the yard. The evening crew is responsible for making up the trains for the next day, so that the morning crew is not delayed and the trains run on time. All the switching happens with the cleaning and food staff still on board, as they get things cleaned and put away for the night. On a typical night, there were three trains to switch and put away. Usually that kept us busy for six to eight hours. Once they were put away, the cleaning crew would wash the exterior. Alaska Railroad takes great pride in its trains, particularly its passenger trains, and they get washed after every trip. Usually they are so clean you can see your reflection in them!

More recently, I have been working the morning passenger switching job. That one basically just moves the trains from the yard to the depot, since the night crew has already put them together. There are a lot of little things to do on that though. The movements are pretty simple, pull out of the yard, wye the train if needed, and park it in front of the depot for the road crew to take over. But we also have to make sure the doors on the platform side are open and the doors on the opposite side are closed. We have to make sure the trap doors, exposing the steps, are in the proper position for high level platform boarding or low level boarding. We also have to make sure the end doors on each car close properly and that the last car has a gate to keep people from stepping out the end door. In the morning, the food service staff are on the train, and the dining cars all smell like breakfast. The cooks get a head start on preparing breakfast, because that will be what the passengers want as soon as they get on the train. Once at the depot, we have to place jump plates between the high level platform and the train, to eliminate the gap between the platform and train. There are barriers on and around the platform that must be positioned to keep people from wandering off where they don't belong, and guide them to the train. Those all have to be repositioned for each train, because each train has a different spot at the depot. So the movements are simple in the morning, but there are a lot of other little things to be done. After all the passenger trains have departed for the day, we usually do a little freight switching and then head home. I like both passenger jobs, which makes me a little different than most. Passenger cars can be frustrating to work with, because they are big and delicate, and the space between cars is filled with wires, hoses, walkways, and other utilities. There are a lot of extra safety rules when switching passenger equipment, especially when it is occupied, but it is something new and different for me.

In the next six weeks, I expect work will be tapering off, as the summer season comes to a close. Most of our passengers will be gone, until May, and our freight will see a bit of a decline as the construction season winds down. Hopefully, this will mean my time to commit to this blog and website will increase, and you will hear from me more! I do have several things in the works, just very little time to work on them!

As always, do not hesitate to email or leave a comment if you have any questions or comments! I promise I will respond!

Tuesday, March 26, 2013

Product Review: MagnaLock Brake Hoses

Pacific Western Rail Systems recently announced the release of working air brake hoses in HO scale, from their sister company, North American Railcar Corporation. These are aftermarket detail parts than can be added to a modeler's existing fleet of freight cars, passenger cars, or locomotives. They also announced that they are currently developing a similar product for all other scales, although in the announcement email I received, it sounded as if N scale may be next. Currently, there is no timeline for future releases in other scales.

Several years ago, Steven and I talked about the possibility of making some sort of working brake hoses, using magnets, but we never gave it much thought, and never tried anything. Since then I had thought very little about having working air brake hoses on models, because it is something that has never before been available, and I suppose I had figured it never would be. However, when I received notification of this, I decided I would have to give it a try, and see if it really worked as well as the video that was in the email.

The brake hoses come in packages of ten pairs. Each hose is rubber with a small magnetic cube on the end. One side of the magnet is red, to identify the top. Other than that, the metal is bare and unpainted, and the rubber hose portion is black. The key to making the brake hoses couple properly, regardless of what direction the car is facing, is to make sure that the red side of the magnet is facing up. Once installed, the magnet can be painted or blackened with a permanent marker.

In HO scale, brake hoses are pretty small. This makes installation a bit tricky. Actually, the first installation is so tricky that I wondered if it was really worth all the trouble. It does get easier after a couple of them though. Besides the air hoses, some wire comes in the packaging, which can be used to form a brake pipe, to which the rubber hose can be attached. The wire would simulate the brake pipe on the car. In order to install the wire brake pipe on most cars, the trucks will need to be removed temporarily.

Once the brake pipe is in place, and the glue has had some time to dry, the brake hose gets glued to that. Out of the package, the brake hoses are not all a uniform length. Pacific Western Rail Systems recommends, in their tutorial, that the brake hoses all be trimmed to 3/8 inches. Cars with longer drawbars or draft gear may require brake hoses longer than this to navigate curves though. Once the brake hoses are trimmed to the proper length, they can be glued to the wire brake pipe, or even the coupler box. PWRS recommends using a 3/16 inch spacer to ensure that the brake hoses do not hang too low and hit switch points, frogs, or guardrails when uncoupled.

Once I had a pair of cars fitted with the hoses, I was excited to see if they were worth all the trouble to get them on. Once the glue dried, I placed the two cars on the layout, coupled them together, and then decided that they are indeed worth the trouble of getting them attached properly! It is amazing how such a small detail really adds to the overall appearance. I plan to buy more of them in the future and continue installing them on my freight cars.

Overall I am very satisfied with the brake hoses. I have big plans to install them on everything, although it will be quite some time before that happens! They add quite a lot to the overall appearance of the car and especially to several cars coupled together.

PWRS does provide a written and video tutorial on installation, however it is only available on their website. It is located on the same page as the brake hoses are sold from.

The air brake hoses will be available to the public beginning on Monday, April 1, 2013.

Manufacturer: North American Railcar Corporation
Item Number : 11-AIR-10H
MSRP: $24.98 for 10 pairs
Available April 1, 2013, currently taking reservations.
Reserve and order through Pacific Western Rail Systems.


Thursday, September 20, 2012

Starting an Old Project

I finally started something I have been talking about for a while now - my model railroad. I drew some plans several months ago, and just a couple weeks ago I finally sat down and figured out what it would take to make them a reality, then I got started. About two weeks ago, on a day off, I went over to the lumber yard in town and picked up some lumber to build the benchwork, and then I put it together that afternoon. It is not a large railroad, and I already knew exactly how I would assemble the benchwork, so it went together pretty fast. All I really had to do was cut and assemble. The benchwork ended up being pretty sturdy, as you can see in the pictures, for two reasons. First of all, I studied construction management, and tend to build everything like it is the foundation for a skyscraper, and second, the 2x4's were cheaper than the 1x4's, which I had originally planned on using.


I will be using two inch extruded foam insulation as the surface on which the layout will be built. That provides a surface that is plenty sturdy, yet easy to work with. I decided not to glue the foam to the framework just yet, because I can do some of the basic wiring before putting it in place. Once the foam is in place, any work on the wiring has to be done from beneath the layout, which means working overhead. Since it is easier to work on something you can stand over, I decided to install the basic wiring before I glue the foam in place. Today I had a few hours to kill, so I finished off the wiring in one section of the layout.

The layout is divided into sections, for portability. I do not have any intention of taking it to shows or anything, but it will very likely have to move in the future. We do not plan to stay in Glendive permantly, and even if we did, we would eventually buy a house. The layout bolts together in two places. The wiring will have jumpers connecting the sections, which can be removed easily, and so the entire thing can be taken apart and moved when that becomes necessary. The bolts will ensure that when the railroad is reassembled, the sections will line up exactly as they were designed to.

I am waiting for some electrical parts to arrive, and when they do I will have a few more things to install before the foam. Once they are in place, I'll glue the foam insulation to the top of the framework, and start laying track. I started cutting the foam today to the proper size so putting that on will be a simple matter of gluing it down. I should be able to get that started this weekend. I plan to lay, electrify, ballast, and weather the tracks before getting too involved in anything else. after that will come the structures and other scenery. Since the layout will represent a fairly industrial part of a fictional town, the scenery will be mostly industrial. There will be very little natural scenery, but it will maximize operations by including quite a few industries served by rail. Besides the industries, there will also be a passenger depot and a rail car shop.


Wednesday, October 26, 2011

A Little Tour

Today being Wednesday, I would normally reserve this post for some stories from work.  However, nothing particularly unusual has happened at work this week, so I thought I would use this post for something else.

Steven and I have both made references to various model railroad ideas and equipment that we own, and we have even posted pictures in the past.  We have never really talked about any current projects though, which we thought might be interesting.  Usually both oh us have about a dozen things going on at one time, and the work bench is often more cluttered than makes sense, but I suppose that is probably not unique to either of us!

Below is a video clip I took today, it is about sixteen minutes long, and it is just a tour of my work bench.  I figured reading most of my posts takes as long as the video lasts.  In the video you will see some of my current projects, a finished project, and a small part of my equipment.  It is totally unscripted, just my thoughts as they occurred to me during filming.  Anyway, enjoy the switch from the normal programming.


As usual, if you have any questions about what you see, feel free to leave a comment.  You can also send us an email at ogden.bros.trains@gmail.com, or you can email me directly at james@ogdenbrotherstrains.com.  Next week, we will go back to our regular scheduled programming, probably.

Monday, August 22, 2011

Modeling Supplies

Most model railroading articles, whether its on here, in a magazine, or anywhere else, assume that you have a full set of modeling tools and that you know where to get everything you need for the project that the article is talking about. Well what if you don't? That is what this article is for. I am going to share some of the places that I get my modeling supplies.

Our first stop is Walthers. Walthers has been around for over 75 years and has turned into basically a model railroading mall. They have their own line of locomotives, rolling stock, and structures, and they carry other manufacturer's products as well, including paint, decals, tools, scratchbuilding supplies, and anything else you can think of. They publish a reference book every year which is a product listing of everything they carry in your scale. This book is an excellent reference to see what's out there. However, I rarely order directly from Walthers. Their quality is good, but their prices are high. I use the reference book to see what products are available, and then I shop around for lower prices. However, there are two reasons to order from Walthers. One is that they often have sales on their products, and when they do, it's very hard to find a better price than their sale price. Another reason is if you are ordering products from several different manufacturers, you probably won't find them all on the same website other than Walthers. You may find them cheaper on three or four websites, but by the time you pay shipping for all the different websites when you order the stuff, you might as well have paid the higher Walthers prices and ordered it all at once for the same bottom line.

You can order paint and decals from Walthers as well, but I don't like to. My local hobby shop has Pollyscale's full line of paints. Pollyscale makes modeling paints for brushing or airbrushing. They make railroad-specific colors, such as railroad tie brown, Boston & Maine blue, and Reading green. Chances are, if you are looking for a specific color, Pollyscale has it. I don't know if you can order direct from Pollyscale, because I have always bought my paint at the hobby shop.

I order my decals direct from the manufacturer because Walthers doesn't carry my favorite decal manufacturer. I order my decals from Highball Graphics as often as possible. These are some of the best decals I have ever used. They slide off the paper with no problem at all and they sit flat on the model and the clear parts completely disappear so they look like part of the model, the way they should. Highball Graphics carries mostly New England road names, but he has a lot of other generic stuff, like reflective striping, that can be used on anything. Also, if you need custom decals, he is willing to print them up, all you have to do is send him an email. However, Highball Graphics doesn't have everything I need, and if another manufacturer carries what I need, then it is cheaper than ordering custom decals. If Highball Graphics doesn't have it, I turn to Microscale. These decals are also very good. The prices are fair and the selection is just amazing. However, the website can get difficult to navigate, so when you find something, make sure you bookmark it so you can find it again.

For structures, I prefer those made by Walthers, Pikestuff, and DPM. Walthers makes a little of everything. Pikestuff makes modern corrugated steel structures, which are modular by design and can be kitbashed with little effort. DPM makes brick structures that are good for downtown scenes. I get my DPM structures from my hobby shop but I order my Walthers and Pikestuff structures from modeltrainstuff.com. This website has great deals on everything they have. They don't carry everything, but what they have is priced very well, and when they have a sale the prices are just unbelievable. I recently ordered some Walthers coal cars from that website at half price.

Tools can get tricky. There are tools that are specific to the model railroading world, which makes them expensive. However, most tools are actually pretty generic. The trick here is to not buy tools that are marketed for modeling if you can avoid it. With only a few exceptions, these tools are generic tools marketed for a specific purpose, and most people won't know the difference. As a result, they cost a lot more. I bought most of my tools at Harbor Freight Tools. This is a tool store all over the country. The tools they carry are no-name brands, so they are cheap, but they are just as good as any name brand tools. Good tools to get are various pliers, files (one set for plastic and one set for metal), wire strippers, wire cutters, scissors, a razor saw and small miter box, small screwdrivers, small clamps, a hobby knife and assorted blades, rulers, calipers for measuring, and safety glasses. Some tools, however, really are specific to modeling and can only be found online, in a craft store, or your hobby store. These include track cutters, a scale ruler, and some glues. For plastic, I use a plastic solvent cement made by Plastruct. I use cyanoacrylite adhesive, or CA, for gluing wood or metal or for bonding dissimilar materials together, such as plastic to wood. This is basically super glue, and can be found just about anywhere. I use a decal setting solution from Walthers for my decals. When I finish a model, I spray it with Testor's Dullcote to seal everything together and get rid of the shiny sheen of the plastic. This is also available at most hobby stores.

Electronics are similar to tools, in that if you order electronics marketed for the hobby it will cost you a lot more. There are two websites I like that carry electronics that can be used in the hobby but are not marketed for it. First is allelectronics.com. They carry just about anything electronic you can think of. I found this website looking for resistors. However, they don't have much for lighting, which led me to find led-switch.com, which carries just about every LED you can think of. Because they are not marketed for a specific purpose, they cost next to nothing. One advantage to getting electronics marketed for modeling is that the manufacturer determines the size of resistor you need and includes it in the package or sells it separately. However, with a little bit of simple math, you can figure that out yourself and get the discount electronics. Maybe one day I will write an article on finding resistor sizes.

I hope this reference helps. James and I are working on a new and improved Links section to the website, which will have one section devoted to modeling. Right now there are a few links in there, but we are going to sort it into categories so you can find what you're looking for more easily. We also have a OBT Favorites section, which has our personal favorite websites for ordering supplies or finding prototype information.

Monday, August 8, 2011

Repainting Walthers Coal Cars, Part 1

Today I am going to walk you through my plan for some Walthers coal cars I ordered recently. They were supposed to be in by now, and I was going to write a product review for them, but they haven't come in yet. I will do a product review after they come in. But for now, let's talk about my plans for them.

I am repainting them. Because of that, it didn't matter what roadname or numbers I ordered, so I got the cheapest ones, which happened to be Walthers Trinity RD-4 coal hoppers. Model Train Stuff was having a sale, and I got four 6-packs for half price, I honestly don't remember which ones, I just got the cheapest ones they had. I am repainting them as Greenbriar Management Services, reporting mark BNBX. Let's just call them BNBX for short. BNBX is a car leaser, they have coal hoppers and coal gondolas running all over the place. They often lease cars to power companies that burn coal, which is what I am trying to model. While the power plant in Bow, NH does not lease any coal cars in real life, I thought it would be cool to have some of these modern coal cars running on my layout, and it would give me some more experience doing a simple repaint job. To start, here is a photo of a BNBX coal hopper:


The paint job should be easy, simply need to spray the cars with aluminum spray paint. After painting the cars, I will need to decal them. I found virtually all the decals I need for this project from two sources: Highball Graphics and Microscale. Here is a list of the decals I will be using:

Microscale TF-18: This will be used for the red ends of the car. It seems easier to cut the shapes out of the decal sheet rather than masking and painting those areas.
Microscale 87-260: This has most of the data I will need for the coal cars. As far as I can tell, nobody makes data sets for these coal cars, so some of the data that is unique to the cars will not be on the models, but this set will cover most of it.
Highball Graphics AD-14: This will do the yellow reflective striping found on most modern freight cars.
Finally, for the reporting marks, numbers, and Plate F signs, Jim at Highball Graphics is doing up a custom sheet for me. If I only had a few cars, I could order an alphabet set for the reporting marks and numbers, but because I have 24 cars, that is a lot of alphabet sets with a lot of extra letters and numbers! Jim has agreed to make a custom sheet with the reporting marks and numbers that I need, sized appropriately. If you need custom decals, I would recommend going to Highball Graphics.

Last but not least, Sergent Engineering has Type F couplers that I want to install on these cars. Most modern coal hoppers and gondolas use Type F couplers. However, last time I checked, the Type F couplers were out of stock, so for now the cars will keep the couplers they come with. I also want to order a working FRED for one car. I'll have to do a little more research on that first.

I am looking forward to painting up these cars. It will be a fun project and will get some modern coal cars on my layout, which is something I've been wanting to do for a while. My standards for a model unit train is the 20-25 car range, so the 24 cars I ordered will be a full train for me.

Monday, July 25, 2011

Another Little Update

I thought I would talk a little about the progress on my railroad again today.  While construction of the actual layout has not advance any, other things have made progress.  I ordered a grain elevator some time ago, and that has made a lot of progress, in that it was built.  There are still a few things to be done with it, but the majority of the work on that is complete.  Additionally, I have established a work area.  That is a nice change.  It is not anything fancy, but it works well and makes a huge difference.

First of all, the grain elevator.  That went from plastic pieces in the box to assembled parts of the building in an afternoon.  Figuring out how it all went together was not difficult.  I kept it in larger pieces so it could be weathered as easily as possible later.  Steven was out here for a couple of weeks recently, and he actually undertook weathering the thing.  It still needs its clear flat coat to hold everything in place and take off any leftover shine.  That will happen this afternoon, as I have the day off.  Once that has been done, it will get the windows installed and then the final parts will all be assembled.  I should be able to have it done by this evening.

The other night, I was frustrated because I had pieces of model railroad equipment scattered all over the dining room table and my desk, and I had no flat surfaces to take care of anything else.  I headed off to work, and while I was on the train that night, I had a bit of inspiration.  The last occupants of this apartment left behind two four foot by eight foot pieces of particle board.  We have several large, sturdy boxes.  It dawned on me that I could use the boxes and a board to set up a temporary work area.  And at four by eight feet, it would certainly be a large work area!  I set that up a few days ago, and finally got all my model train stuff off my desk and the dining room table.  I figured while I am not actually building the model layout yet, I can still utilize the space in the room for other projects.  I found an extra chair, and dragged that to the room, and just like that, I have a workbench.  That was a huge improvement, yet such a simple one.  Once it was all set up, which took only about an hour, I could not believe it had taken me so long to think of it!

Just to help you keep up, below is a photo of the railroad room with the workbench in place, and already occupied with tools, models, and projects.  It still needs some organizing.  As I moved stuff off the floor, dining room table, and desk, it just went wherever there was space on there.  Right now it is a little cluttered and highly unorganized, although that should change as I use it over the next week or so.

Monday, July 18, 2011

Cushioned Drawbars

On the railroads, some freight cars have cushioned drawbars to help protect their load.  They absorb some of the shock of coupler slack running in and out.  They are most commonly found on cars which carry shiftable loads, such as centerbeam cars, bulkhead flat cars, vehicle carriers, and some box cars.  They can be added to model trains, although they require some minor modifications to the pocket that holds the coupler.  This project can be completed in just a few minutes though.

Original coupler pocket.  Photo by Steven Ogden.
Typically, inside the coupler pocket on most HO scale freight cars, there is a round peg that holds the coupler in position.  This allows it to swing from side to side, but usually it occupies most or all of the mounting hole in the coupler.  I use Sergent Engineering couplers on my cars, which have a round mounting hole, with a rectangular slot on the knuckle end of the hole.  By trimming the sides off the mounting pin, this will allow the coupler to slide in and out, while still allowing it to swing from side to side and holding it in the right place.  These modifications will work best with Sergent couplers, but they could be adapted for just about any type of coupler.

Modified mounting pin.  Photo by Steven Ogden.
To do this you will need a hobby knife or similar cutting tool.  You will also need a small spring for the cushioning effect.  If you are using Sergent couplers, you know they come with a small spring, and those work just fine.  For those of you who do not use Sergent Engineering couplers, the springs are available for sale on their website.  They should work just fine, regardless of what coupler type you are using.

Since the Sergent couplers already have a slot in them, in addition to the mounting hole, I cut the mounting pin down small enough to fit into that slot.  This will restrict side to side movement of the coupler when the drawbar is compressed, but on model trains, they serve very little useful purpose anyway!

Cushioned drawbar, with the coupler pocket still open.
Photo by Steven Ogden.
Once you have tripped the mounting pin to the appropriate size, it is time to put the coupler and spring in.  Inserting such a small spring can be a little tricky.  I find it is easiest to do with a small flat head screwdriver.  You can insert the screwdriver into one end of the spring, and then insert it at an angle.  Once it is in position, the screwdriver should come out without disturbing it significantly.  At that point, you will want to close up the coupler pocket before testing.  Testing it with the pocket still open could result in the tiny spring flying out and being lost forever!  Once you close it up, make sure to test it.  It will work best with the coupler centered.  If it works, put the car back together and enjoy!  If you notice that it is hanging up or is not working, you may have to open the coupler pocket again and make sure the modifications to the mounting pin are clean.  If there is any plastic that has not been removed properly, it could catch on the coupler and prevent it from working properly.  Chances are if the coupler does no work properly right away that is the problem.

Once the cushioned drawbars are complete, you will have protection from coupler slack for your model railroad loads.  However, because model railroad cars weigh so little, the cushioning will have very little effect on overall train handling.  In fact, unless your cushioned car is the first in a long train, you will hardly notice it!  If you put a couple of cushioned cars ahead of about 20 other cars, and then shove hard, you'll notice the drawbars absorbing some of the force, but they only work under extremes on the model railroad.

Monday, July 4, 2011

Detailing Brick Structures

Today I am going to talk about brick structures. There are several different ways to model them, the most common being structure kits molded in plastic with a brick pattern molded right into the plastic. You can also get paper brick sheets, which glue to the material you're using to build the structure, and have a brick pattern printed on them. These are fully finished for you, but offer less detail because the brick pattern is two-dimensional. I am going to focus on detailing plastic brick patterns.

There are three ways to model a brick building in plastic. You can get a kit that has all the pieces you need. Some companies, like Walthers and DPM, offer modular brick systems, where you can buy different components and use them to construct a custom-designed building. You can also scratchbuild a structure with plastic brick-pattern sheets available from several manufacturers. You can combine these methods, but make sure that if you use different materials, the brick patterns match each other unless you are going for a mismatched look, often found in buildings that have been expanded over time. Walthers brick sheets match the pattern and colors found in their modulars and most of their kits, so you can scratchbuild an annex or another portion of the building using their brick sheets.
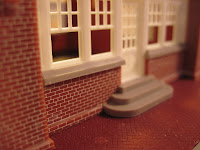
One problem with plastic brick is the obvious lack of mortar. Some brick buildings are painted over, so the brick and mortar are all the same color. These are easy to model, but most brick buildings do not get painted over. I have tried several mortar techniques, and I will share two of them today. Both techniques require you to paint the bricks first, if they are not already the color you want. This can be done by airbrushing or using a spray can. Brick colors vary, so color matching isn't much of an issue.

The first technique I tried was using acrylic paints. I used a white paint and thinned it down, and then spread it over a portion of the brick pattern. Most of it soaked into the low areas, where the mortar goes. Then, with a damp paper towel, quickly wipe down the area you just painted. Thinned acrylic paint dries quickly, so you have to work in small sections so you can wipe it down quickly. This can leave white streaks on the brick faces, which some buildings have, so it is not completely unrealistic. This method is easy and provides a very even finish for the mortar. I do not have any photos of buildings I have mortared with this technique.

The second method, which I found in an old Walthers catalog, is also quite a bit harder and more tedious, but I tend to use it more. This involves using spackle, a wallboard putty, as the mortar. Using your finger, get a small lump of spackle and spread it over the brick pattern. It will fill in the mortar crevices and leave a nice finish. However, it will also lump into other areas, such as under window sills and in doorways, where you do not want it. After it has dried, use a dull hobby knife to remove these unwanted lumps. Using this technique makes it harder to get an even fill in the mortar, and requires much more patience, but I think the results are worth it.

Once the mortar is in place, it is time to focus our attention on the bricks themselves. If you're really ambitious, you can use a hobby knife to chip away at some bricks to give them an aged look. I'm not that ambitious, so I leave the shapes alone. However, I do take colored pencils, usually a bright red, a grey, and a white, and individually recolor some of the bricks. How many and what colors are up to you, as every building is different. Some newer buildings don't have any miscolored bricks, thanks to advances in the kiln technology which allows all the bricks to get fired evenly, regardless of where they are in the kiln. If you didn't repaint your bricks, it is a good idea to spray them with dullcoat before doing this step. Colored pencils do not write on bare plastic, but they do work well on paint.

To weather the bricks, use whatever techniques you usually use for weathering structures. I try to keep most of the dirt near the ground. If the building has a chimney, put some soot near the top of the chimney. Window sills often have streaks running down from them, caused by rain. On bigger buildings, big bolts were often used to hold the wooden beams inside the building to the exterior brick walls. These bolts often have star-shaped decorative washers. You can get plastic models of these. Streak the paint coming off of those with a burnt umber or black oil paint, using the same technique I've shared for rusting in a previous post. Notice the star washer with the streaked paint in the photo of brick mill in Nashua.

Well, there you have it. With just a little work (okay, the colored pencil step takes a while), you have a well detailed brick building. No more solid red brick walls on your layout now!