Showing posts with label Union Pacific (UP). Show all posts

Monday, June 16, 2014

Union Pacific Big Boy #4014

Union Pacific recently purchased one of their Big Boy locomotives, a massive 4-8-8-4 articulated steam engine, from a park in southern California.  In late April and early May, the engine was moved from California to Cheyenne, Wyoming, for restoration.  Once restoration is complete, it will join the Challenger #3985 and the Northern #844 in Union Pacific's steam program.  While on the move, the Big Boy was put on display in various towns along the way, including Salt Lake City, UT and Ogden, UT.  I was still living in the area then, and I was able to go up to Ogden to see the engine on the day it was on display there.

The Big Boys were designed for Union Pacific's steep mountain grades between Ogden, UT and Green River, WY.  In modern days, when more horsepower is needed, more locomotives are put on the train and cables are connected between them so that one train crew can control all the locomotives from the lead locomotive.  In areas where helper engines are needed, these are put on the back of the train and usually have their own crew.  Steam engines, by nature, can't do that.  Every engine on a train has to have its own crew.  That is why, in steam days, you rarely saw doubleheaded trains.  Both engines had to have their own crew, and had to rely on whistle signals to let each other know what they were doing.  This was inconvenient, and Union Pacific didn't like doing it on their line between Green River and Ogden.

Thus the Big Boy was born.  UP wanted a locomotive that could pull a train on that line without help.  They had a 4-8-8-4 wheel arrangement, meaning they had two sets of eight driving wheels each.  They burned coal, but the 4005 was later converted to burn oil, but the conversion was poorly designed and did not work properly.  The design has been improved since then, and like the other two engines in UP's steam program, the 4014 will be converted to burn oil.  They were built by American Locomotive Company, the first twenty (4000-4019) were built in 1941 and five more (4020-4024) were built in 1944.  They earned their nickname when a worker at the ALCo plant in Schenectady, NY wrote "Big Boy" on the front of one of the engines as it was under construction.  The nickname stuck, and today that is what everyone knows this design by.  The locomotives were not in service long, as diesels began taking over shortly after they were built, and the last one ran July 21, 1959.

Below are some of the photos I shot in Ogden, for a full album visit our facebook page.


For the rest of the photos, please visit the photo album on our facebook page.  If you have not "liked" our page, search for "Ogden Brothers Trains" on facebook and you will find it.


Friday, February 28, 2014

Photo: Union Pacific Stack Train


Steven sent me this photo of a Union Pacific stack train traveling through one of the Salt Lake City, UT, suburbs several months ago, and I have been meaning to share it. Sorry to keep you waiting!
-James

Saturday, November 23, 2013

Where the Rails Meet the Sea

Whittier, Alaska, is a unique town for a variety of reasons. It is only accessible through a railroad tunnel, which has had the tracks embedded in concrete, making it possible to drive a highway vehicle through. Whittier has about 180 residents, nearly all of whom live in the same building. Whittier is also the only interchange point on the Alaska Railroad.

The Alaska Railroad has no direct rail connection to any other railroad in North America, making the interchange of railroad cars more challenging. Whittier is a port town, and the railroad maintains a barge slip there which is utilized for interchange operations. Alaska Marine Lines owns three barges, Whittier Provider, Anchorage Provider, and Fairbanks Provider. Each barge has eight tracks on the deck. They also have stantions to support shipping containers above the deck, high enough to clear most rail cars. Each track on the barge is over 400 feet long, making it possible to ship more than 40 freight cars on each barge. Approximately 5,000 tons of cargo can be hauled in the rail cars. The barges which carry rail cars also carry shipping containers above the rail cars. Approximately 10,000 tons of cargo can be moved in containers on each barge.

In Seattle, Washington, the Alaska Railroad maintains another barge slip, which is the other terminal for railroad barge operations. In Seattle, cars are loaded and unloaded from the barges by the Union Pacific Railroad. From there, they can go anywhere in North America.

Besides the barges operated by Alaska Marine Lines, the Canadian National Railway built another similar barge, called AquaTrain. They operated that barge for a long time, but more recently it was sold to Foss Marine, and they currently operate it.  It also has eight tracks, although only six tracks go to the end of the barge. There are two switches on the barge to access the two shortest track. The AquaTrain also has no container loading capacity. It operates between Whittier and Prince Rupert, British Columbia. In Prince Rupert, rail cars are loaded and unloaded by Canadian National.

The barges which connect the Alaska Railroad to the rest of North America are all large, ocean going barges. The tugboats that tow them are less specialized than the barges, but are also large, ocean going vessels. The three Alaska Marine Lines barges operate on a rotating schedule, with weekly departures from both Whittier and Seattle. The AquaTrain simply ferries cars back and forth between Whittier and Prince Rupert. A trip between Whittier and Seattle typically takes about a week in good weather. In the winter, when the weather is less cooperative, it is not uncommon for those trips to stretch out to ten days, and occasionally to two weeks. The trip to Prince Rupert is typically about two days shorter.

The railroad and the barges operate 24 hours a day, and in all weather. Usually the weather in Whittier is rainy and windy, but whenever the barge arrives, it gets unloaded. The quicker it can get unloaded, loaded, and out of port, the more money it can make. The sooner foreign rail cars get off the Alaska Railroad, the sooner the railroad can stop paying the per diem for them.

When a barge is expected in Whittier, a train leaves Anchorage to meet it. It is about a two hour train trip to Whittier usually. Often the trip is planned so that the train gets to Whittier ahead of the barge enough to get things switched out and organized before the barge gets there, so that everything is ready to go when the barge arrives. Typically, about half of the train consists of cars that are going on the barge, and the other half is mostly intermodal flat cars that haul shipping containers. When the train arrives in Whittier, it must be split up to fit in the yard. The flat cars all get put in places where the longshoremen can unload the containers that were brought in.  The containers usually get stacked up around the yard, where they will be out of the way. Many of them are empty, since Alaska does not export many containerized products. During some parts of the year, there can be refrigerated containers full of fish, destined for cities all over North America. The remaining cars on the train typically get placed on one or two tracks on Whittier yard, wherever they will fit. Once all the cars are out of the way, it is time to unload the barge.

Before unloading the barge, the train crew, barge crew, and several managers meet together in a little shack near the dock. Besides getting out of the rain for a few minutes, there is a lengthy discussion about the logistics of unloading the barge. Concerns such as heavy cars, long cars, or wide cars are brought up. Tide information is referenced to make plans, since unloading can only occur during certain tidal conditions. Once all the questions are answered, a plan is made, and the meeting adjourns. Everyone working on the barge and slip area gets a hard hat and a self inflating life preserver. The goal is to stay out of the water, but better safe than sorry.

When unloading begins, the conductor usually goes on the barge. The stevedores unlash all the cars, and once unlashed, the engine is coupled to the car at the stern. The conductor releases all the hand brakes, except the one at the stern. At the bow, the cars are typically coupled to a large steel block, called the headblock, which is welded to both the deck and the bulkhead at the bow. The conductor uncouples the cars from the headblock, and then instructs the brakeman to release the handbrake at the stern and pull the cars. The cars are pulled off the barge at walking speed or less, and up the slip. The process is repeated for each track.

The barge has eight tracks, but the slip only has three. Because of this, the barge must be moved several times during the unloading process. When in port, the barge is tied to several hydraulic winches, which allow the crew to reposition the barge to access other tracks. The tug stays lashed to the port side of the barge, though it is rarely called upon to provide assistance in moving the barge. Unloading is planned to coordinate with the tide, weight of the cars, and balancing the barge. The barge has large ballast tanks, which can be filled with seawater to offset uneven loading and unloading, but balance must still be taken into consideration. At times when the tide may get too high or too low to use the slip, the order of unloading can be used to cause the barge to lean to one side or the other, which can be used to help offset tidal changes.

After the rail cars are off the barge, forklifts are brought onto the barge and the load of containers are unloaded. These containers are loaded onto the now empty flat cars that were spotted all over the yard earlier. Usually there are far more containers than there empty flat cars though, so some of the containers get staged out of the way in the yard until more flat cars arrive. The containers that were brought to Whittier on the train are then loaded on the barge.

Usually by the time the barge has been unloaded, the train crew no longer has time left to work. Between the trip to Whittier from Anchorage, the switching before the barge operations, and then the barge operations, 12 hours can be used up easily. The crew goes to a hotel in Whittier to get some rest. While that crew is resting, another train arrives from Anchorage. It is similar to the first, and is about half flat cars and half interchange cars. The crew that brings that train into Whittier spends several hours switching in Whittier. They get all the newly loaded flat cars together again, as well as the cars that arrived on the barge. They spot more container flat cars, and usually a few more cars that need to go on the barge for the other crew to load later. Usually they cannot take all the cars that came off the barge, because a train of that length, plus all the flat cars, cannot be assembled between the yard and the tunnel to leave town. Some of the offloaded interchange cars remain behind, but all the flat cars are taken out of Whittier, back to Anchorage.

The longshoremen spend the time loading the barge with the containers that arrived from Anchorage on the two trains. They are less affected by the tide since their vehicles are on tires and are not coupled together, and so they work while the train crew rests. The goal is to have all the containers in place and secured by the time the train crew comes back on duty to load the barge.

When the first crew is rested, they go back on duty to load the barge. That shift usually starts with some switching, after the conductor and the barge crew chat for a few minutes about the placement of cars in the barge. The idea is to put the cars in an order that makes sense, so that each track on the barge only needs to be accessed one time during the whole operation. Once the interchange cars are put in an order that will work, everyone meets in the shack to go over the plans for the day. This meeting is very similar to the one held prior to unloading the barge, and many of the same topics are covered again, including the tide, the weather, car weights, and the order of loading. Once all the questions are answered and a plan is developed, everyone gets on their hard hats and life preservers again and goes to work.

Once again, the conductor works on the barge, and the brakeman on the slip. The brakeman gets the train to the barge, and then the conductor controls the movement on the barge. The train is brought to a stop one car length away from the headblock. At that point, the conductor places the last car in emergency and secures the hand brake. This gives the engineer something to push against, particularly when the tide is low and the slip is downhill towards the barge. Once the brakes are applied on the last car, the conductor gently couples the car to the headblock. Stopping one car length away from the headblock helps ensure that this happens gently. Coupling too hard to the headblock can potentially move the barge. Since the slip rests on the stern of the barge, too much movement could cause the slip to slide off the barge, opening up a space through which rail cars could fall into the ocean. Fortunately, this is extremely rare, because everyone is very careful when working on the barge! Once the cars are securely coupled to the headblock, the brakeman secures the hand brake on the car on the stern, and then uncouples the rest of the train. The stevedores lash the cars down, and when they are done, the same process happens again on another track.

Once the barge is loaded, the train crew puts together all the flat cars that remain, and any leftover interchange cars that were unloaded previously. Usually there are a few that the other crew was unable to take with them. The whole train gets an air test and then heads for Anchorage. In Anchorage, the crew will bring the train into the yard, where it will usually fill one of the longer tracks. They go home, and the yard crews break the train up, and prepares all the freight to head to different destinations all over Alaska.

Monday, September 16, 2013

Product Review: Athearn Genesis 4-6-6-4 Challenger Locomotive

Today we are going to take a look at a recent release by Athearn, in their Genesis product line. I actually preordered this locomotive, and the model I got was Union Pacific #3985. This happens to be the one that is preserved by Union Pacific as part of their steam program, although it has been laid up for some time. The reason for the lay up in unclear, although there are a number of rumors that speculate on some major mechanical issue. However, the HO scale counterpart operates very well!

UP #3985, at the Northern Lights Model Railroad Club.
All Photos by James Ogden.
Athearn's Genesis line of products are generally high quality models, and the Challenger locomotives are no exception. They are offered in three road names and undecorated. In addition to Union Pacific, for which there are five road numbers to choose from, they are also available in Denver & Rio Grande Western and Clinchfield Railroad. DRGW and Clinchfield are each available with one road number. All models come factory equipped with DCC and with Tsunami sound, by SoundTraxx.

Exterior
The exterior of the locomotive is primarily black, but features numerous separately applied detail parts. The model includes numerous pipes and hoses, as well as all the grab bars and hand rails found on the prototype. The wheels are all metal, as are the various side rods, connecting rods, and valve gear. All the drive wheels actually provide pulling power and electrical pickup. The locomotive includes crisp, clear lettering, and includes some of the smaller lettering, such as the builders plate, and various other data and information, all of which is readable. The locomotive features an LED headlight and even has lighted number boards. The pilot comes with a non operating, scale size coupler, but a replacement coupler pocket, with an operating coupler, is also included in the box.

Cab and Firebox detail.
The tender also features a high level of detail and equally crisp lettering. The tender also has numerous separately applied detail parts including hand rails, grab bars, and piping. The tender also features metal wheels, which also serve as electrical pickup. The locomotive and tender together have at least 15 axles with electrical pickup, making this a very reliable locomotive, even on dirty track. There is a rear headlight on the tender, which functions automatically when the locomotive moves backwards. The tender is connected to the locomotive with a drawbar, which is permanently attached to the locomotive. Additionally, there is a small bundle of jumper wires that connect the locomotive to the tender.

Tender Detail
Overall, the engine and tender feature a high level of detail and an excellent paint job. Additionally, the model comes with a small bag of additional detail parts which can be applied by the modeler.

Operation
The Challenger models are dual mode, and can be operated on a DC system or on a DCC system. Some of the sound functionality is reduced when operating on a DC system, since there would be no way to activate many of the sounds without DCC functions.

When the locomotive is placed on the tracks, it immediately begins making sounds, although the number of sounds coming from a stationary, idling steam locomotive are considerably less than a diesel locomotive. Once the locomotive starts moving, the sound picks up dramatically as the locomotive begins to work. This particular locomotive sounds like it is chuffing very quickly when it moves, but that is due to the two sets of cylinders. The exhaust chuffs would be twice as frequent when compared to a simple steam locomotive.

Running Gear and Firebox detail
The locomotive operates smoothly at low speeds, although there seemed to be a slight delay in the response time. It was almost as if the decoder had to think about what it was told to do. Besides the short delay, the locomotive operated very smoothly and very well. The decoder can sense how hard the locomotive is working and adjusts the sound effects and volume accordingly. When the locomotive is pulling a heavy train up a hill, the chuffing becomes noticeably louder and sharper. When the locomotive is headed downhill with the same heavy train pushing it, the chuffing becomes much quieter and the locomotive sounds like it is drifting.

The one thing that really stands out about this locomotive is the pulling power it can achieve. I brought it in to the local model railroad club the day it arrived to take it on a trial run. The club layout includes some grades, one of which is pretty near three percent. Towards the end of the evening, I decided to couple all the cars I could find together and see what the locomotive could pull. Originally, I found 58 cars, coupled them all together, and began pulling. About halfway up the hill, the locomotive pulled the coupler and coupler box right off one of the freight cars. I decided to try with the remaining 57 cars, and the locomotive successfully pulled them around the layout numerous times. It slowed down dramatically for the big hill, and the chuffing became very loud and sharp, but it never stalled. In fact this locomotive by itself out pulled three locomotives that another member had brought in that same night. I was astonished at the pulling power of this locomotive. I have never had a locomotive that could pull as much as this Challenger can.

Sound
The sound decoder for this locomotive came factory installed. Athearn contracted the sound to SoundTraxx, which makes some very good mobile DCC decoders. The decoder equipped in this model is no exception. The decoder is located in the tender, as is the speaker. The quality of the sound is very high, and the number of effects are also very high. Besides the obvious sounds, such as the exhaust chuffs, air brakes, and horn and bell, the locomotive also features some of the less obvious sounds, such as the blower, injector, and the dynamo that powers the headlight. Not all sounds are used though. For example, the decoder comes with the sound of coal being shoveled into the firebox. This one can be activated by the user, but comes deactivated, because these locomotives were converted to oil. Currently, UP 3985 burns oil when in excursion service.

Overall I am very pleased with this model. While I do not usually model Union Pacific steam locomotives, I must admit that the quality of this model makes UP steam a tempting prototype! The model looks great, performs (and pulls) exceptionally, and sounds impressive doing it. Besides that they have a reliable Athearn drive system, with outstanding electrical pickup.

Manufacturer: Athearn Genesis
Part Numbers:
G97223 (UP Black #3707)
G97224 (UP Black #3710 w/ Smoke Deflectors)
G97225 (UP Grey/Yellow #3977 w/ Smoke Deflectors)
G97226 (UP Black #3982 w/ Smoke Deflectors)
G97227 (UP Black #3985)
G97228 (DRGW #3800)
G97229 (Clinchfield #675)
MPRP: $599.98
http://www.athearn.com/Search/Default.aspx?SearchTerm=Challenger+ATHG&CatID=THLS

Bonus! I took a couple of videos of this locomotive pulling its 57 car train.

This first video is coming off a grade, over the trestle by a glacier on the Northern Lights Model Railroad Club layout.


The second video is on more or less flat track, across a drawbridge.


Monday, May 20, 2013

Piedmont Ghost Town

(This blog post was received recently from Steven, in a handwritten letter. The photos came shortly afterwards, after he had a chance to go take a few. All the text and photographs included are from Steven.)

Muddy Creek Campsite Marker
All Photos by Steven Ogden.
 Located in the southwest corner of Wyoming, lies a town called Piedmont, whose history is closely tied to the history of the transcontinental railroad. Piedmont was settled by the Byrne and Guild families. Mrs. Byrne and Mrs. Guild were sisters, and they named their new town after their Italian hometown, which means, "foot of the mountains." Located near the Uinta Mountains, the town is appropriately named.

Before the railroad came through, the area was an important stop on the California Trail. Fort Bridger, about 12 miles east of Piedmont, was the first supply point west of Fort Laramie, several hundred miles to the east. The Oregon Trail left the California Trail about 100 miles east of Fort Bridger, but many wagon trains going to Oregon continued to Fort Bridger for supplies, before turning towards Oregon. At this junction, a few miles past Fort Bridger, and close to Piedmont, Brigham Young, the leader of the first wagon train to the Salt Lake Valley, made an arrow out of rocks, pointing the way for the wagon trains following his, so they would know which way to go. There was a good camping site on the Muddy Creek, just a few miles north of Piedmont, where almost every wagon train and handcart company going to California and the Salt Lake Valley camped. Later the campsite became a Pony Express station, where the rider would exchange his tired horse for a fresh one, and keep riding.

Cabin Remains
Piedmont was settled in the mid 1860's, before the railroad came through. It served several purposes. First, it served as a base camp for the workers who built the railroad grade in preparation for the track to be laid. Since it was located near the Uinta Mountains, which had good timberland, railroad ties were made there and sent to where the track was being laid. The railroad rented Piedmont in 1868, a year before arriving at Promontory Point. Going west out of Piedmont, the railroad climbed a steep, eight mile grade, to get around the Aspen Mountains. Piedmont became a helper base, where helper locomotives were put on the rear of westbound trains, to get them over the grade.

Moses Byrne, one of the original settlers, saw some opportunity with the timberland and the railroad so close. He built charcoal kilns and began making charcoal in Piedmont. The finished charcoal was shipped by rail to the smelters in Salt Lake City, to fire the foundries there. The charcoal industry and the railroad kept the town pretty busy, and Piedmont quickly became a typical western frontier town, with a general store, hotel, train depot, and several saloons.

Charcoal Kilns in Piedmont, WY.
In early May of 1869, Thomas Durant, the Vice President of the Union Pacific Railroad, was traveling on his recently completed railroad, to Promontory Point, for the Gold Spike Ceremony, which was scheduled to take place on May 7, 1869. When his town arrived in Piedmont however, they found the track blocked by angry railroad workers. The railroad owed them over $200,000 in back wages, and they had decided they would get their money, even if it disrupted the Gold Spike Ceremony. Thomas Durant wired the railroad's headquarters for the money, and when it arrived, the disgruntled workers let him continue west. As a result, the Gold Spike Ceremony, marking the completion of the transcontinental railroad, happened three days later than planned, on May 10, 1869.

Butch Cassidy, a famous train robber, met up with some of his gang in Piedmont, in 1896. They boarded a train there and rode to Montpelier, Idaho. They robbed the bank in Montpelier, and then took the train back to Piedmont. There are two stories about the events after this. One story says that Butch Cassidy traveled by rail to New York, where he used the money to hire a lawyer for one of his friends. According to the other story, the money is still buried somewhere near Piedmont.

At the turn of the century, the railroad and the charcoal business were still what kept Piedmont alive. However, in 1901, the Union Pacific opened a tunnel through the Aspen Mountains, eliminating the steep, eight mile grade, and bypassing the town of Piedmont. With the railroad gone, there was no way to ship the charcoal to Salt Lake City, and the charcoal industry quickly fell apart. The other businesses in town soon closed their doors, with the general store closing last, in the 1940's.

Piedmont Today
Piedmont today is one of the most accessible ghost towns in the area. It is on a dirt road, but it is easy to drive because it was built on the original railroad grade. There is a monument near the road, marking the location of the former town.

Descendants of the Guild family live near Piedmont. They own a large ranch and live just a few miles south of where the town once stood. Many of the Piedmont buildings are still there, although there have been no efforts to preserve them. Many of them are on the Guild ranch. The kilns, however, have been preserved and are on public property. The cemetery, which lies south of the town site, is also accessible. The Muddy Creek campsite, where many wagon trains have spent nights, is on the county road into Piedmont, and the foundation for the Pony Express station is still visible.

The fort, at Fort Bridger, has been preserved, and is actually open for tours during the summer. Fort Bridger is probably the best place to visit, to learn more about the area, as it is still an active community and is just a few miles off Interstate 80.

Thursday, January 24, 2013

Creating a Union Pacific Museum Car

Over the last two evenings, I have been working on a small project with my Union Pacific heritage fleet.  Recently, the Union Pacific put a large American Flag wrap on one of their baggage cars, and turned it into a Museum Car, which can frequently be found on their business and excursion trains.  I found some photos of the car, Union Pacific 5779, "Promontory," and decided that I wanted something similar in my fleet.  Actually, the reason I went looking for the photos was because I had found decals on eBay, for what the seller called the "UP Flag Car," and I was curious to see what they were talking about.  RR Picture Archives has several photos of the prototype, both before and after the flag artwork was added.  After looking at several of the prototype photos, I decided that I could make such a car, so I bought the decals.  I am not sure who makes the decals, as they came in a blank envelope and there was nothing written or printed on the decal sheet, other than the decals themselves.

When the decals arrived, I had one baggage car which I could have used for the decals, however I had already decided that that particular baggage car was destined to become an Alaska Railroad car.  So, I began searching eBay for the correct, 85-foot, six axle baggage car, on which I could use the flag decals.  Surprisingly, even after several weeks, nothing had surfaced on eBay.  A week ago, I was in Billings, and decided to stop at Jim's Junction, the local hobby shop, and take a look around, and much to my surprise, he had exactly the baggage car I was looking for.  I bought the only one that was on the shelf.  It was a Chicago and Northwestern baggage car, but it had been painted up in the Union Pacific colors for use on their "City" trains.  This was a fairly common practice, for UP and CNW to share equipment on those trains.  It really did not matter what the lettering was anyway, because it would all have to be removed, regardless of what it said.  While I was in the hobby shop, I got talking to another modeler in there, who suggested removing the lettering using a pink eraser.  I had heard that before, and decided to give it a try.

When I got the car home, I went out and bought an eraser, making sure I got one that was soft, and had no grains or grit, which might scratch up the paint.  I began erasing the "Chicago" on one side of the car, but I was disappointed because after several minutes, there were no noticeable results.  There was some black residue on the end of the eraser I had been using, but as far as I could tell, it had done nothing to the lettering on the car.  I decided to clean the eraser off and try again.  At that point, I started to notice the letters fading, so I kept going.  It was a fairly tedious process, to get the "Chicago and Northwestern," "Railway Express Agency," and the little REA star off both sides of the car, but after a while, it was all done.  I had the blank yellow car I needed.  I did notice that pushing harder on the eraser did not necessarily yield better or faster results.  Actually, it tended to start to remove the  yellow paint too, so a gentle grip on the eraser, and a bit of patience, seems to be the best way to go.  I did notice that the the eraser made the paint a little shinier than in areas where I had not removed the lettering.  This was minor and only visible under close inspection in just the right lighting conditions.  I did not worry about it too much, because I figured the dullcoat would help to hide it in the end.

Once I was satisfied that I had successfully gotten all the lettering off, and there were no more stray marks from the lettering, I began cutting out the decals.  The decals came on one large decal sheet, so whatever I cut out would be the size of the decal I would apply to the car.  I carefully cut the decals out very close to the edge of the printed area, so that there would be very little extra clear decal material around the actual flag image.  Once the flag was cut out, I used it to determine which grab bars would need to be removed before I could apply the decal.  I then removed the roof of the car, removed the windows, and removed the grab bars.  I stored the eight grab bars and the windows in a small plastic zip-lock bag, so nothing would get lost or dropped.  The next step was to apply the decal.

The flag decal was the largest of the decals I had to apply, which lead me to believe it would be the most difficult.  I decided to start with it, because the number and other lettering would be a lot easier in comparison.  I started by using a paintbrush to apply some Micro-Sol to the surface of the car.  The car has a smooth side, so I knew only a little would be needed, in most areas.  Where there were changes in the surface of the car, such as around the baggage doors and around the grab bar holes, I applied the Micro-Sol a bit more liberally.  Micro-Sol helps decals to conform to the surface of a model, particularly when the surface is uneven or irregular.  It also helps to prevent tears from forming in the decal over uneven and irregular surfaces.

Getting the large decal on and aligned properly was a bit tricky.  Actually, it was a full test of patience, honestly!  Because the decal is so large, the entire thing must be moved at once when adjustments are needed, to prevent tears or bubbles from forming.  Moving and adjusting a decal that is nearly as long as the car is quite tricky, especially over the changes in height where the doors are.  I had thought about cutting the decal at the doors, but decided against it, because the cuts would have to be very precise to make the car look right, and then the alignment of the sections would have to be exact.  That seemed like more trouble than it was worth!  I used a paintbrush and liberal amounts of Micro-Sol around the doors to make sure that the decal formed to the surface of the door openings without bubbling.  After what seemed like hours of adjusting the decal, but was probably only several minutes, I was finally satisfied with it and I set it aside to dry.  I then went to cut out the other lettering, logo, and number for the car.  At this point, the decal had been applied over the window openings, which I knew I would need to cut out later.

Once I was satisfied that the flag decal was dry, I applied the number.  On one side of the car, the number decal went on top of the flag decal.  The logo and lettering went on the side of the car, beyond the end of the flag.  I then cut out two small holes in the flag decal, which I think are vents on the prototype, and the windows.  I also reapplied the grab bars.  I set the car aside again, so the number and letter decals could dry.  I decided to dullcoat that side of the car as soon as the decals were dry, so that I would not damage the decals while working on the other side.

The next evening, I did the opposite side of the car.  The other side of the car went nearly the same as the first, except that the flag decal is reversed.  Having done it once, I was a bit more confident the second time around, and perhaps slightly more careful.  It seemed to go a bit faster though.  Once I was satisfied with that side, and the decals had dried, I put some dullcoat on there, to seal the decals in place, and set the car aside again.

This morning, I checked the decals and the dullcoat.  I ended up doing a second very light application of the dullcoat because I wanted to hide the edges of the logo decals a little better.  Once that was dry, I replaced the windows and reassembled the car.  Now I have a museum car to for my Union Pacific Northern steam locomotive (#844) to pull around the layout with my other Union Pacific passenger cars.

Materials:
Walthers "City" Series Baggage 932-9574
Block Eraser
Flag Decal (available on eBay)
Micro-Sol

Friday, September 7, 2012

Photo of the Week: Old and New

I apologize for my complete lack of new blog posts lately.  Needless to say, engineer training has been keeping me quite busy!

Today, I have chosen a photo from my archives.  After I graduated from high school, several years ago, I moved to Utah to go to college.  Well, what really happened is I went to some classes, but spent still managed to spend most of my free time running up to Salt Lake City to look at trains.  Up to that point, I had never lived around the Union Pacific or any mountain railroading, so there was a lot to see.  When I first went out to Utah, the Utah Transit Authority had not expanded to include any commuter rail operations, and the light rail system was significantly smaller than it is today, but I still used the system frequently.

The photograph I settled on comes from April 2006.  The semester had just ended at school, and so I really did have nothing better to do than run to Salt Lake and look at trains.  I went up there wanting to do a few things I had not gotten during the winter.  On the bucket list for that day was to ride the entire light rail system, known as TRAX, which at that point included two lines.  One line went from the Delta Center (now the EnergySolutions Arena) to Sandy, and the other to the University of Utah.  I had been on the Sandy line many times to Salt Lake, but never the University line.  I also wanted to find the Amtrak station, which at the time was several blocks from any transit, and now is the largest central transit hub in the city, and home to the commuter trains, known as FrontRunner.  I also wanted to find some of the old stations in the city.  I knew that TRAX ended near the old Union Pacific station, which is now part of the Gateway Mall complex. Besides all that, of course, I wanted to go look at some Union Pacific trains.

During the course of that day, I managed to get several pictures of the TRAX light rail equipment while it laid over at the Delta Center (now Arena) station, which was the end of the line at the time.  The tracks ended in the middle of the street, directly in front of Union Pacific station.  The contrast between the two struck me.  The new, modern, light rail vehicles and infrastructure take up most of the view, but in the background is the old station, with its ornate stone and brick work, large windows, and enormous neon sign, that makes the former owner quite clear.  While train service to Union Pacific station ended when Amtrak moved to their current depot, the station continues to serve as a convention and event center, which can be rented out for private events and parties.  I never was able to find out why the TRAX train said "Special" on the destination signs, but it was parked on the tail track at the end of the platform, possibly awaiting a busier time of the day.


If you would like to see your photo featured as a "Photo of the Week," please email it to ogden.bros.trains@gmail.com, with a description.  We would be happy to share some of your favorite photos!

Monday, December 5, 2011

Product Review: Trinity 64-Foot Reefers

This week we are handling our product review a little differently.  Usually we just review one model at a time, but recently two companies have produced models of Trinity's modern 64-foot refrigerator cars.  ExactRail has produced multiple runs of these popular models, under their Platinum Series line, and BLMA Models has produced these cars in both HO scale and N scale.  I recently purchased one from each company.  I have some equipment already from ExactRail, and I have been quite satisfied with their products in the past.  I had never purchased anything from BLMA Models before, but I have heard good things about them, so I decided to purchase one of these cars from them as well, and see one of their products in person.  I am quite satisfied with both models, but before we jump to that, and other conclusions, we should talk about the models a bit!

ExactRail reefer model.  All photos
by James Ogden.
Exterior:
Both models are excellent representation of the modern reefers that can be found on today's railroads.  The paint quality is very good.  While the cars are basically white, the logos and lettering is all crisp and clear.  At first glance, the models appear to be identical.  They are extremely similar.  Under close inspection, one can notice a few small differences throughout both cars.  The ExactRail model tends to have more of the very smallest writing, and the smaller writing on the ExactRail car tends to be slightly clearer than on the BLMA car.  Other than that, and a few extremely small variations in the placement of certain warnings, the paint and lettering on the cars is basically identical.

BLMA reefer model.
Both cars feature an impressive amount of separately applied details, including grab bars, brake rigging, railings, hoses, and various other parts.  Upon close inspection I was able to find exactly one detail part molded on the ExactRail car which had been applied separately on the BLMA car.  Additionally, both cars feature prototypically accurate refrigeration machinery.  Both cars have a see through metal walkway for machinery access.  The ExactRail walkway has slightly smaller holes than the one on the BLMA car.  While both walkways look excellent, I would say it is the most noticeable difference between the two cars.  Additionally, the ExactRail car also features safety chains on either side of the walkway.  The refrigeration units are slightly different on the two cars.  This is not unusual to the prototype though, as there were several phases of these reefers, and through different construction contracts, it is quite possible that otherwise identical cars could end up with very slightly different refrigeration units.  The BLMA model did some minute writing and warnings on the "A" end, with the refrigeration unit, that were not present on the ExactRail model.  On the "B" end of the cars, the only difference was in the hand brake chains.  For the extremely detail oriented modelers, the BLMA model had a more accurate hand brake chain.

The "B" ends, side by side.  The BLMA model is on the left.
Both cars featured a well detailed under body, complete with brake gear and rigging.  These parts were separately applied on both cars.  On the BLMA model, the entire under body was modeled in a flat black, while on the ExactRail car, the under body was a very dark grey.  Both cars come with Kadee couplers, and feature air hoses mounted beside the couplers.  The BLMA model had plain black air hoses, while the ExactRail model had painted and molded glad hands on the end of the air hoses.  The trucks were very accurately modeled, even featuring the car initials and number stamped on them.  On both models, they did even match the actual car initials and number.  On both models, the end caps on the roller bearings was modeled in blue.  While this is accurate for a new bearing cap, it is unlikely that many blue ones would be found on the prototypes because as the cars run, they get dirty.  It looks good on the model, but it may not be the most realistic feature.  If any weathering is done to the cars, the end caps will likely be covered by that anyway.  The only difference between the trucks was only noticeable from the bottom.  The ExactRail trucks feature brake shoes and brake beams inside the trucks, which is not modeled on the BLMA car.  This is a detail that is not even very noticeable on the one to one scale, especially as a train passes by!

The "A" ends, with the BLMA model on the left.
Operation:
These cars operate well out of the box.  While the couplers are not mounted in a box that can swing, both manufacturers used couplers with a long enough shank to make these cars able to navigate a curve as tight as an 18 inch radius.  Both cars rolled smoothly, easily, and quietly.  I did find that the BLMA car rolled slightly better, although it was only noticeable when I was trying to take pictures.  The surface I was using to photograph the cars was a few tenths of a degree off level, and that was enough to send the BLMA car rolling.  While the ExactRail car also rolled with ease, it was able to stand still on its own on the same surface.

Door area detail on the BLMA model.
Overall I am very impressed with both cars.  They will look great operating together, and it would take a careful look to find the differences in them.  I will have no problems running them right next to each other on the same train.  Because the cars are such accurate models, they are very similar, and thus choosing which one is better really is a matter of opinion.  Personally, I like the ExactRail car better, and the only reason is purely a matter of preference.  I like that it has slightly smaller holes in the walkway deck and safety chains.    I am very pleased with both cars though and would not hesitate to buy more of them from either manufacturer.  Both companies managed to exceed my expectations with these cars.  I think they are an excellent value, especially considering the level of detail offered.

Under body details on the ExactRail model.
*Note:  Typically Steven and I only write reviews on cars that are currently available from the manufacturer, however we made an exception with this review because the ExactRail cars are still available at many local hobby shops and online retailers nationwide.  They are extremely popular and sold out at ExactRail completely within just a couple of weeks, however it is rumored that there may be yet another production run.  The BLMA car shown in the photos is no longer in production, however BLMA has announced another run of these popular models with a CEFX reporting mark.  They will be nearly identical to the model shown in the photos.  If you are interested in either of these cars, contact your local hobby shop.

Manufacturer: BLMA Models
Retail Price: $32.95 each, available individually or in packages of 6, 12, or 24.
Product Numbers: 52901-52924
*Note: These cars are currently not in production.  Pre-orders are due Dec. 31, 2011, and cars will ship in the spring of 2012.

Manufacturer: ExactRail
Retail Price: $32.95 each
Product Numbers: EP-81050-25 to EP=81050-42
*Note: These cars sold out at ExactRail very recently and are still available through local hobby shops and online retailers.  Contact your hobby shop for availability information, and let ExactRail know if you would like to see another run of these cars.

Monday, February 7, 2011

Another Project Begins

I have been thinking about building a model of the Union Pacific Depot, in Salt Lake City, UT, for some time now.  It is an old brick and stone station building, which is now part of a nice outdoor mall called The Gateway.  The station was used as such until the late 1990's, by Amtrak.  During that time, the city officials wanted to consolidate the various railroad lines in town and develop some of the neighborhoods they occupied.  At one time, Salt Lake City was home to the Union Pacific, Southern Pacific, Western Pacific, and Denver & Rio Grand Western, among other short lines.  Since these railroads were competing with each other, they all had their own yard and station facilities, as well as their own rights of way.  Downtown Salt Lake City was covered in railroad tracks.  By the late 1990's, all those different railroad lines were owned by the Union Pacific, which meant consolidation was a realistic possibility.  As the rail lines were consolidated, the right of way was moved several blocks away from the Union Pacific Depot, and an "Amshack" was built to accommodate the Amtrak trains that serve the city.

Union Pacific Station, seen from the EnergySoluntions Arena.
Photo by James Ogden
Originally the station was built by the Oregon Short Line and the San Pedro, Los Angeles, and Salt Lake Railroad.  It was completed in 1909.  Both railroad lines eventually were acquired by the Union Pacific Railroad, and with that, they also received the station in Salt Lake City.  The building itself is a large, French Renaissance style building.  It is constructed of brick and stone, with a copper roof.  The copper roof was installed in 1978 to replace a badly leaking slate roof.  On the top of the building, above the front entrances, there is a large, neon, Union Pacific sign, complete with the shield logo of the railroad.  The track were once located behind the building.  Today, though not used as a station anymore, the neon sign is lit every night, and the building remains a landmark in Salt Lake City.

The front entrance of the station.
Photo by James Ogden
My plan is to model this building in HO scale.  I will model it with the tracks out back, as it would have been found when in use as a station.  I am also going to model the copper roof, even though that was not added until 1978.  I do plan to model a basic interior.  I would like to have an accurate representation of the main concourse.  The whole station will be lighted, and there will be people inside.  Of course, it will get the landmark neon Union Pacific sign on the roof too.  Actually, the whole project came about because of that sign.  I had been wanting to model this for some time now, but I found a model of that very sign at a train show recently, and I bought it.  I guess that was the first piece of the project.

Wednesday, December 1, 2010

Product Review: Walthers UP City Series 48-Seat Dining Car

(James)

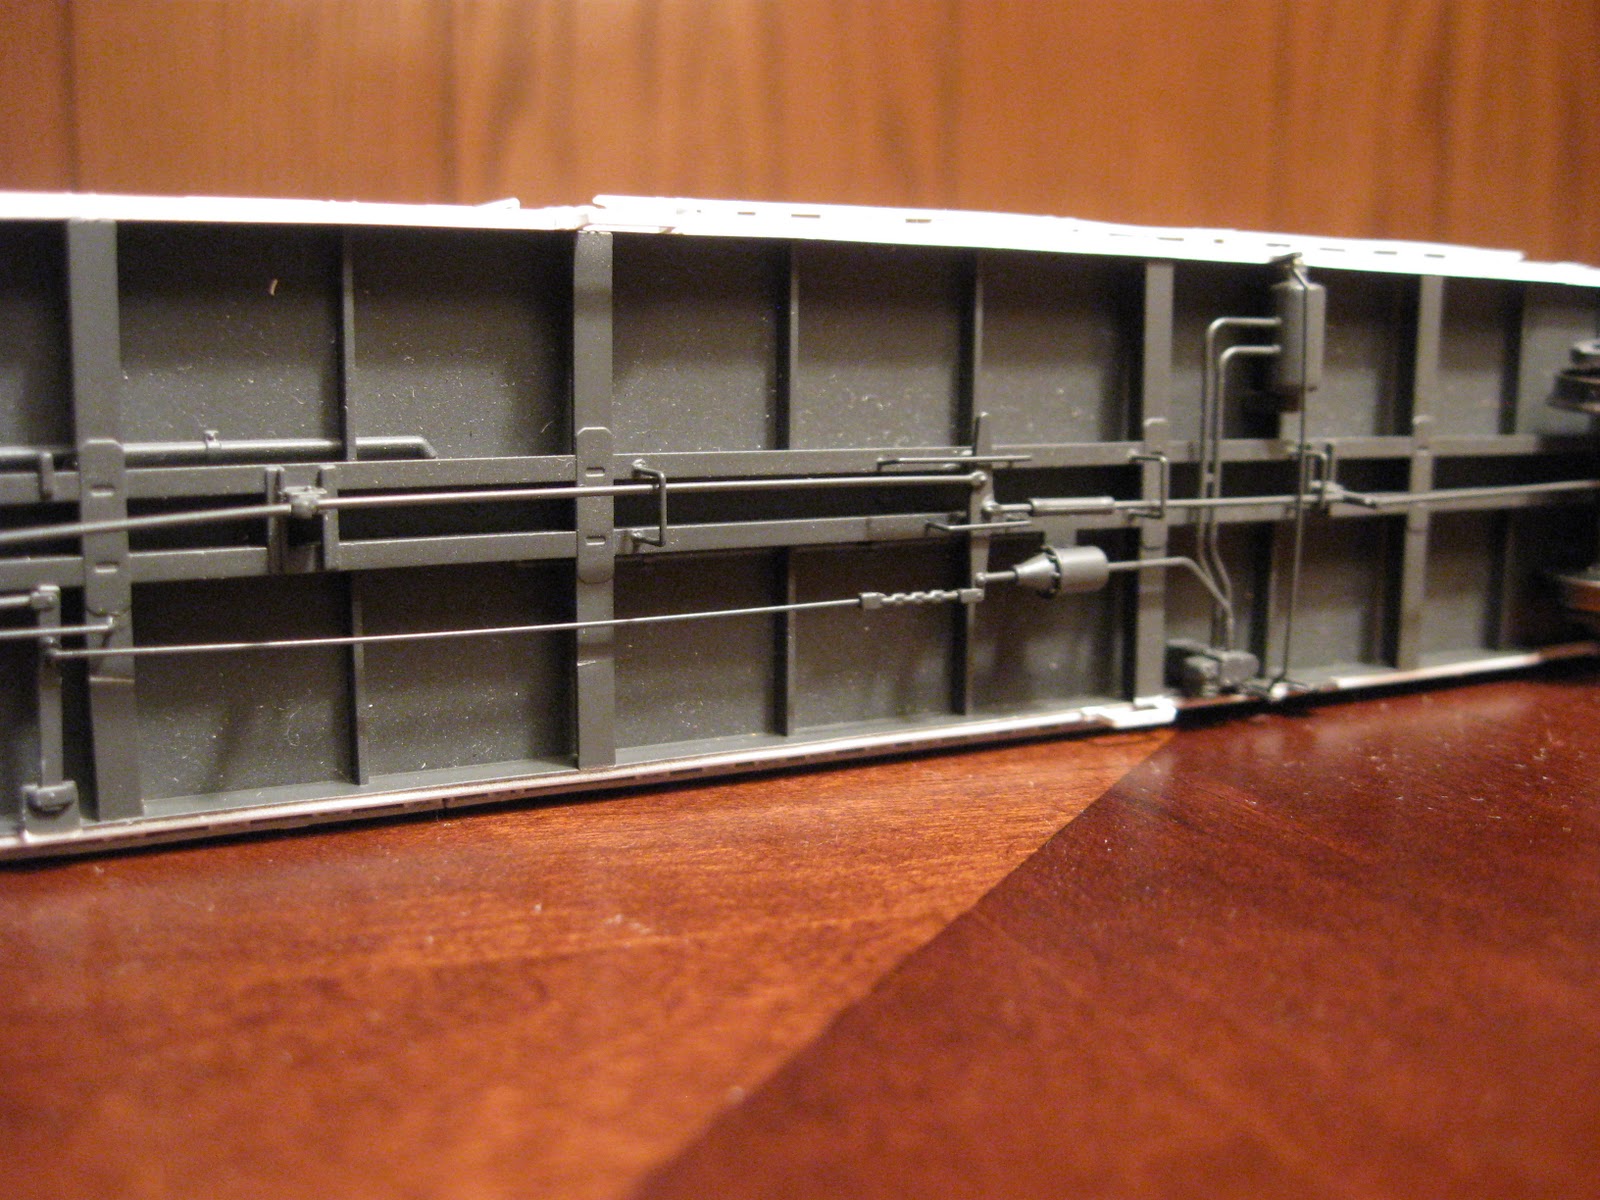
Today I have decided to review one of Walthers' new Union Pacific City Series cars.  The car I have is a model of their ACF 48-Seat Dining Car.  This series features factory installed grab bars.  All cars come with decal sheets so the owner can number the car how they wish.

Exterior:
This unit looks very nice.  The paint is all very crisp and clear.  All lines are sharp, and the paint scheme is prototypically accurate.  Every car comes from the factory lettered for Union Pacific.  The lettering is sharp and clear.  Generally the lettering is centered along the side of the car, above the windows.  With the dining car, there are several doors, which all are in their proper locations along the sides of the car.  One of those doors interferes with centering the "Union Pacific" lettering, and so it has been adjusted.  Just as on the prototype, the lettering has been moved down the side of the car to accommodate for the door.

The details on the car are very well done.  The factory installed grab bars are all in their correct locations.  Roof and undercarriage details will meet the expectations of even the most serious modeler.  The roof even features all the rivets that can be found on top of one of these dining cars.  Additionally, the roof features vents and an antenna which were found on the City Series diners.

The undercarriage is very nicely modeled.  It does leave out some of the details, such as piping, wiring, and any rivets that may be found there.  However, all the machinery and electrical components are correctly modeled.  The end detail on the car is also very good, with a proper Common Standard Tall diaphragm, metal grab bars, and even the rivets that one could find on the prototype.  The model comes with Proto MAX metal knuckle couplers.  I have chosen to replace those with Type F couplers from Sergent Engineering, for a little added realism.  Typically passengers have Type H couplers, however those are not yet available, and a Type F is the closest available.

The trucks feature metal side frames for electrical pickup.  The wheels are metal, and feature a split axle which fits into a plastic sleeve, to insulate them from each other.  They wheels and metal truck side frames are part of a system which allows the owner to install lights.  The trucks are painted silver and have prototypically correct details including suspension components and brake rigging.  The prototypes had clasp brakes which operate on the wheel tread.  Walthers has modeled those correctly.

Lettering Detail
Interior:
This car features a complete interior, installed at the factory.  The dining area is easily visible through the large windows on that end of the car.  The kitchen area is harder to see as the windows are smaller and spaced farther apart.  Opening the car reveals that the kitchen area is complete as well.  Opening the car up, we find four metal posts, located in the corners of the car.  Walthers produces lighting kits, which are available separately.  There are two versions available, one for DC layouts, and one for DCC layouts.  These posts found in the car are designed and located for an easy, drop in installation of one of these lighting kits.

The car features a good level of detail on the interior, and certainly makes it convenient to light the car.  People could also be added easily once the car was opened.  The only thing the interior lacks is proper interior decorations.  The interior is unpainted, so the car arrives from the factory with a plain, beige interior.

Operation:
This car operates smoothly, although from the factory it does not roll very freely.  Walthers recommends lubricating the trucks to aid in rolling.  I have found that a little graphite added to each of the wheel bearings helps quite dramatically.  In one or two cars, it may not matter if the bearings are lubricated or not, however if you have a long train, you will find that it will take fewer locomotives to pull a lubricated train.  The difference is quite noticeable.

Grab Bar Detail
Walthers does not recommend operating the car on curves tighter than 24 inches.  This is due in part to the length of the car, and also to the size of the coupler pockets.  Since there is a lot of underbody detail, the coupler pockets cannot be wide enough to allow the coupler to swing as far as it may need to for tighter curves.  I found that the car operated without problems on 18 inch radius curves, when it was by itself.  When coupled to another car, it could operate on 22 inch curves, but was not able to operate around anything tighter than that.  I found that this was due to the diaphragms not being flexible enough to accommodate tighter curves.  Once I replaced the couplers, I found that the cars struggled even on 22 inch curves.  The Sergent Couplers have a slightly shorter shank than the Proto MAX couplers.  While they look great, they do limit the operation of passenger cars a bit.

Prototype Information:
These cars were originally built between January and April 1949.  A total of 17 were built for the Union Pacific Railroad by American Car & Foundry.  They were numbered 4800-4816, and have a capacity for 48 passengers.  Electricity came from an on board motor generator set.  Overall weight is 149,200 pounds.  Walthers includes a card with additional model and prototype technical information.

Overall I am very satisfied with this model.  I think it is a great representation of a Union Pacific Dining Car.  I was moderately disappointed at the price.  Walters lists the retail price for this car at $64.98, which is higher than the chrome plated Superliner cars cost.  This is a single level car, without a metal plated finish.  While this features factory installed grab bars, and many other single level passenger cars do not, I do not feel like that justifies such a high price.  The level of detail is very good, but it is very good on most of Walthers passenger cars.  I feel like these cars are priced a bit high.

I had just one other frustration with the car.  Some people will be buying these cars to model Union Pacific's excursion fleet, rather than model the City Series trains.  As I was looking at the decals, I found that there was no number for the excursion dining car, which is #4808.  This would have been a number built with all the other diners, and it seems like Walthers could put that on the decal sheet for those modeling the excursion fleet.  Since that is what I am doing, and I was set on having my car be #4808, I ended up cutting apart several decals and making my car #4808 anyway.  It was a lot more work than I would normally like to number a car that comes with number decals though.

I am still very satisfied with the car, despite the two drawbacks.  Despite the high price, I will still be buying more of the Union Pacific City Series cars, though I will be looking for them on sale.  They do look great behind my model of FEF-3 #844!

Manufacturer: Walthers
Model Number: 932-9540
Retail Price: $64.98